Or, “How I made an orchestral sample library in my free time for under $10,000”
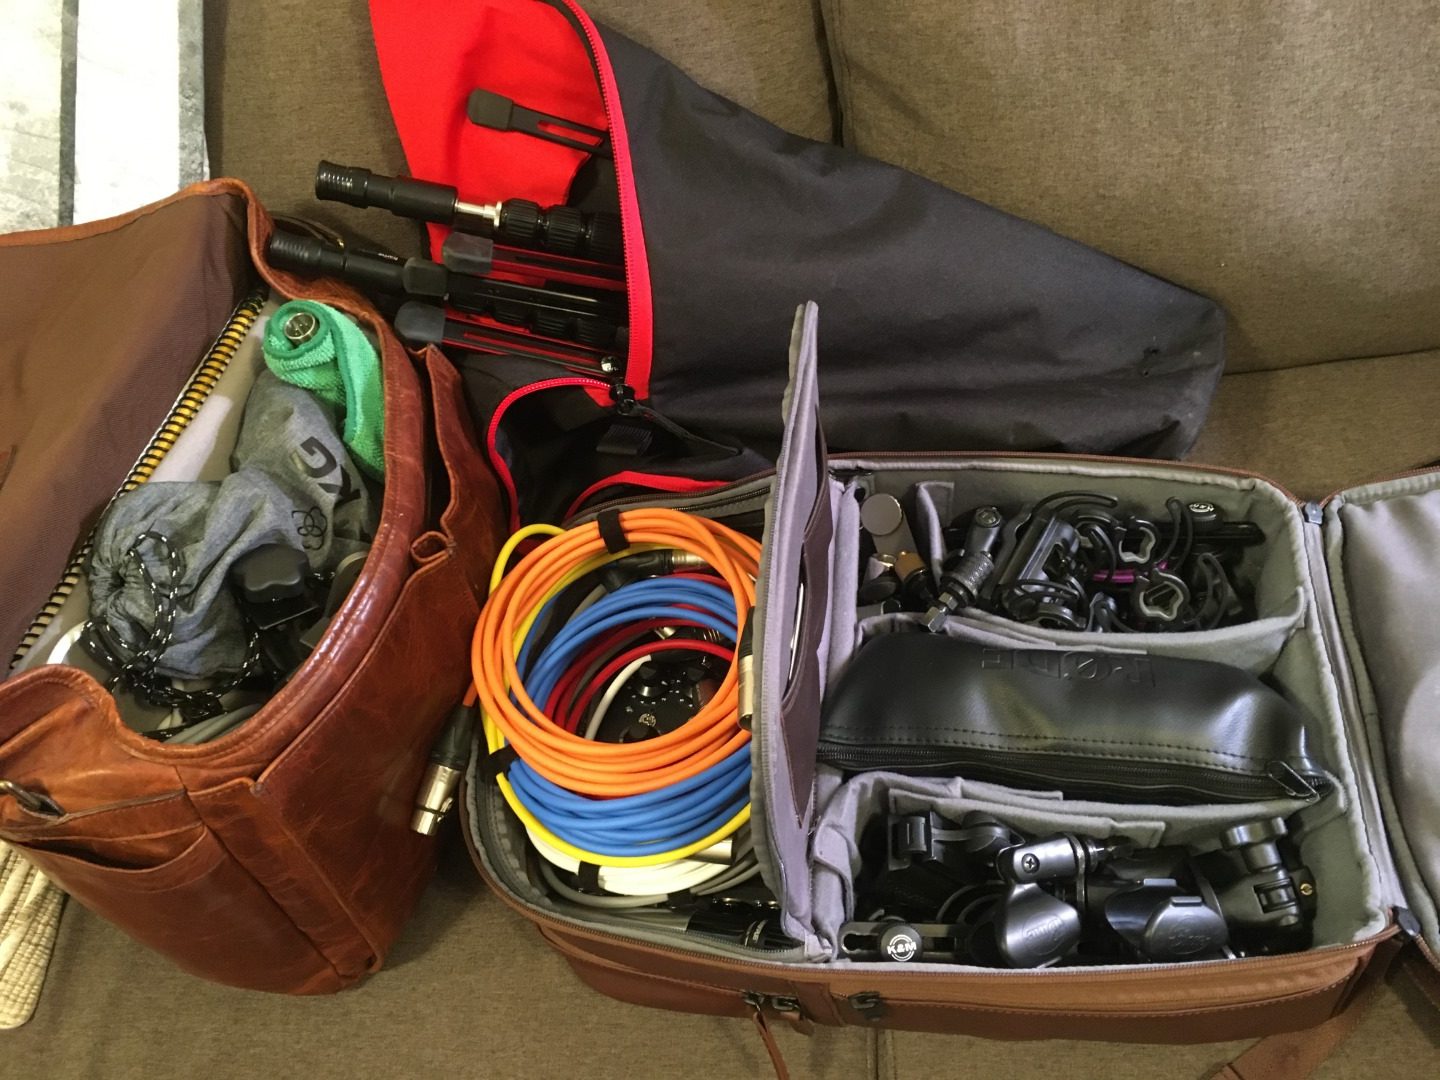
Mobile Sampling Kit
If you are not recording at the same place your equipment is stored (e.g. personal studio) OR at a professionally equipped studio, you will need to put together a mobile sampling kit. Here is a checklist of everything you will need for a basic multi-mic recording session, all portable by a single individual.
- Bag containing the following-
- 3-9 20′ XLR cables (one extra, always)
- Microphone baskets/clips, mounted on quick releases for speed
- USB cable or other connector for audio interface to connect to laptop
- External battery (e.g. SmallRig VB99 or similar) to power laptop, interface (if possible); USB C power cables.
- Otherwise, you will need a 25′ extension cord and a power strip!
- Backpack containing the following-
- Laptop with recording software; laptop charger
- Audio interface with 2-8 inputs
- 2-8 mics (LDC’s, SDC’s), carefully wrapped in cloth or bag (or both!)
- Auxiliary Mics (optional)
- 1-2 pairs of headphones (monitoring/checking- don’t leave them at home!)
- 32-128 GB USB 3.0 flash drive (e.g. Sandisk Extreme- very fast!)
- Microphone Stand Bag containing-
- 2-8 microphone stands (aluminum or carbon fiber is optimal)
- Any mic stand accessories (e.g. XY bar- save a stand, save an arm)
A “life hack” to consider is sticking to USB C-powered or battery-powerable audio interfaces only. It can be tempting to bring some large, AC-powered interface like a Scarlett 18i20, but the extra cables and power equipment will add weight, complexity, and time to your setup. If you need 8 pres, get a portable recorder like a Zoom F8n Pro or Sound Devices MixPre-II 10.
If you are transporting gear alone and have no vehicle and/or have interest in not wasting time, also do NOT bring:
- Hardware mixing board
- Rackmount units (unless they fit in backpack or can be safely wheeled along)
- Large standalone preamps, especially tube pres
- Expensive microphones
- Any other fragile or temperature-sensitive equipment
This setup was designed and honed for maximum efficiency and minimum excess weight. It should be portable by a single individual for at least 30 minutes of travel on foot and can be fully set up and ready to record in 10-15 minutes with practice.
That’s right, 10-15 minutes of setup. If you are used to studio recording, you are probably used to anywhere from an hour to a full day of soundchecks, mic tests, etc. With guerrilla sampling, every minute of wasted time could be another extra half octave of range or another dynamic layer of staccatos. I even recommend “drilling” at least twice a week with setting up and breaking down your equipment and getting levels and mic positions so that it becomes second nature. Eventually you want to be completely on auto-pilot through this so that you can explain the process of sampling to the musician while you set up, but more on that later.
For a more advanced setup, you may consider using some rackmount equipment on a mobile rack case (2-3U max!).
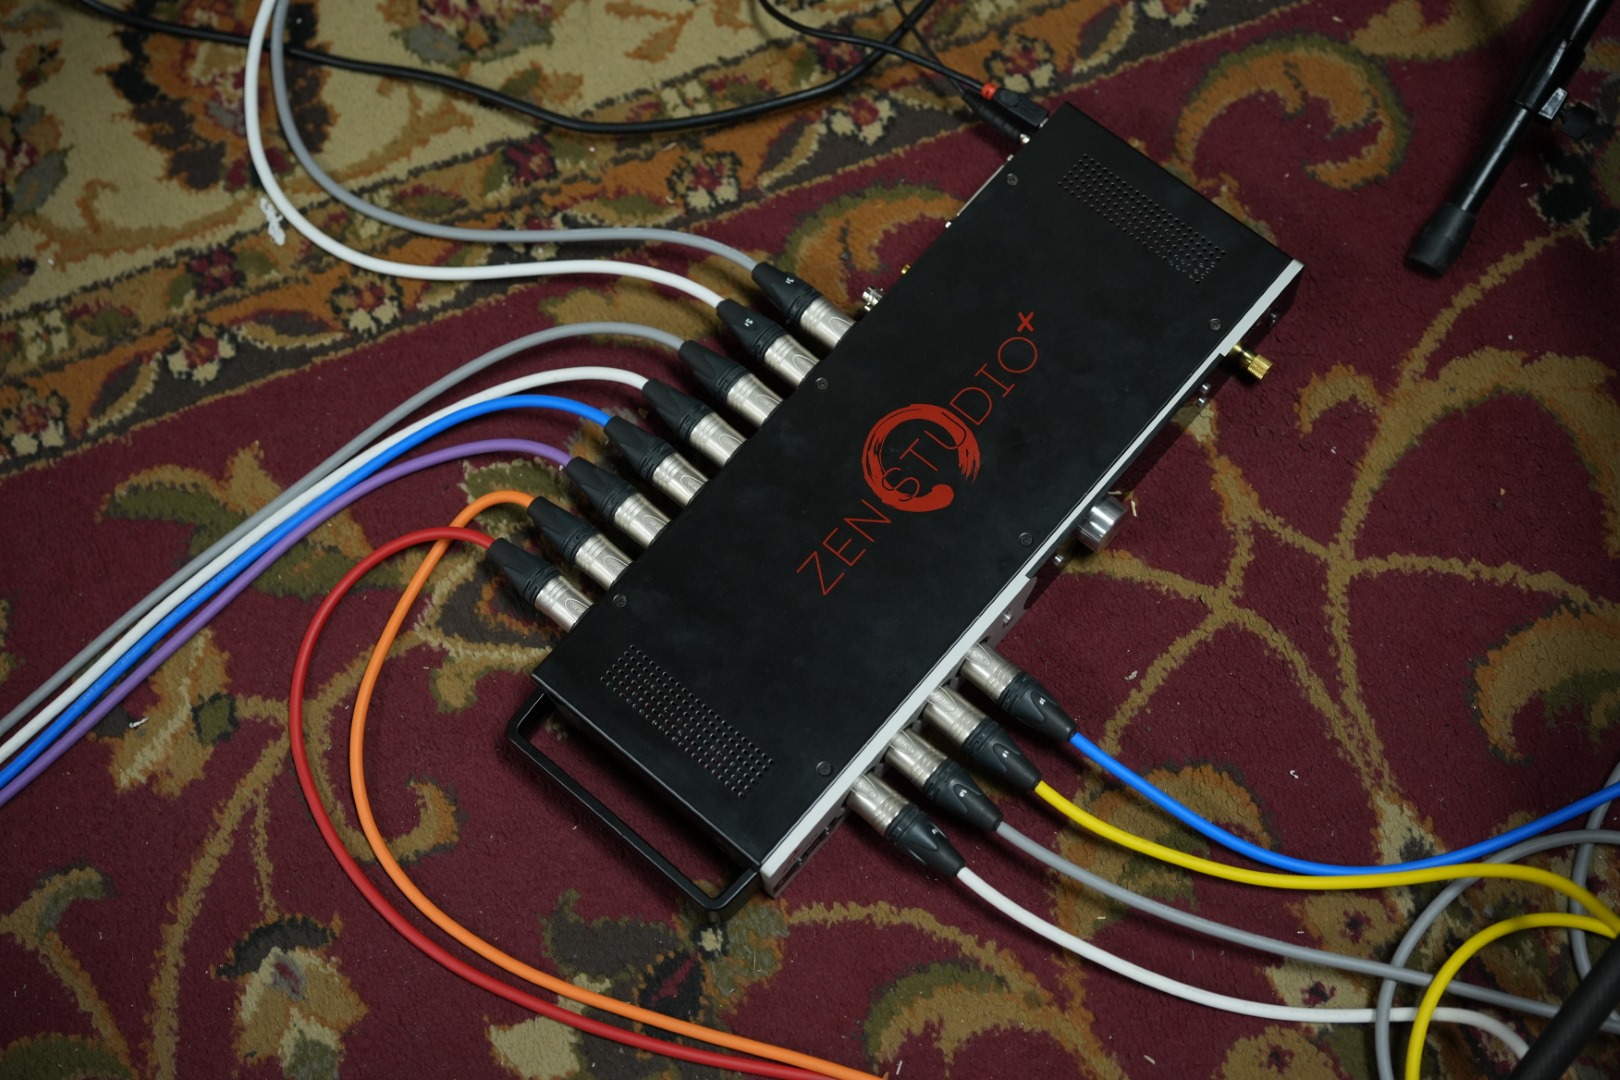
Mic Cables
The best mic cable is, quite famously “the one that connects the mic to the preamp.” Overall the quality of the connectors and the assembly matters more than the actual cable, as most faults in cables are the result of broken solder joints or ill-fitting or corroded connectors not making proper contact anymore.
If you can have cables custom made, having “stereo sets” in matched grey/black or grey/white cable or one of each color will help differentiate cables and significantly cut back on errors in conections. White and other colored cables are also more noticeable than standard black, so provide a much lower risk of tripping.
You should get pairs of cables of several lengths, e.g. 6′, 10′, 15′, 20′, 30′, 40′ (perhaps a few of 20′) so that you can use just the “right amount” of cable per run and minimize weight and cable mess for your back, your safety, and the overall looks. Short cables are just as dangerous than too long, so a little slack is always fine.
I recommend sticking to Neutrik connectors as they are very reliable and widely used. For cable, I am quite a fan of Canare and Mogami starquad cables. I now use miniature Mogami 2893 because it’s about 35% lighter than normal mic cables and that adds up with 10-15 lbs of cables.
You probably won’t need to use snakes or stage boxes in ordinary sampling so don’t bother getting one.
It’s not necessary to go overboard on tidiness, but not having knotted bundles of cables lying around waiting to trip people is definitely a plus!
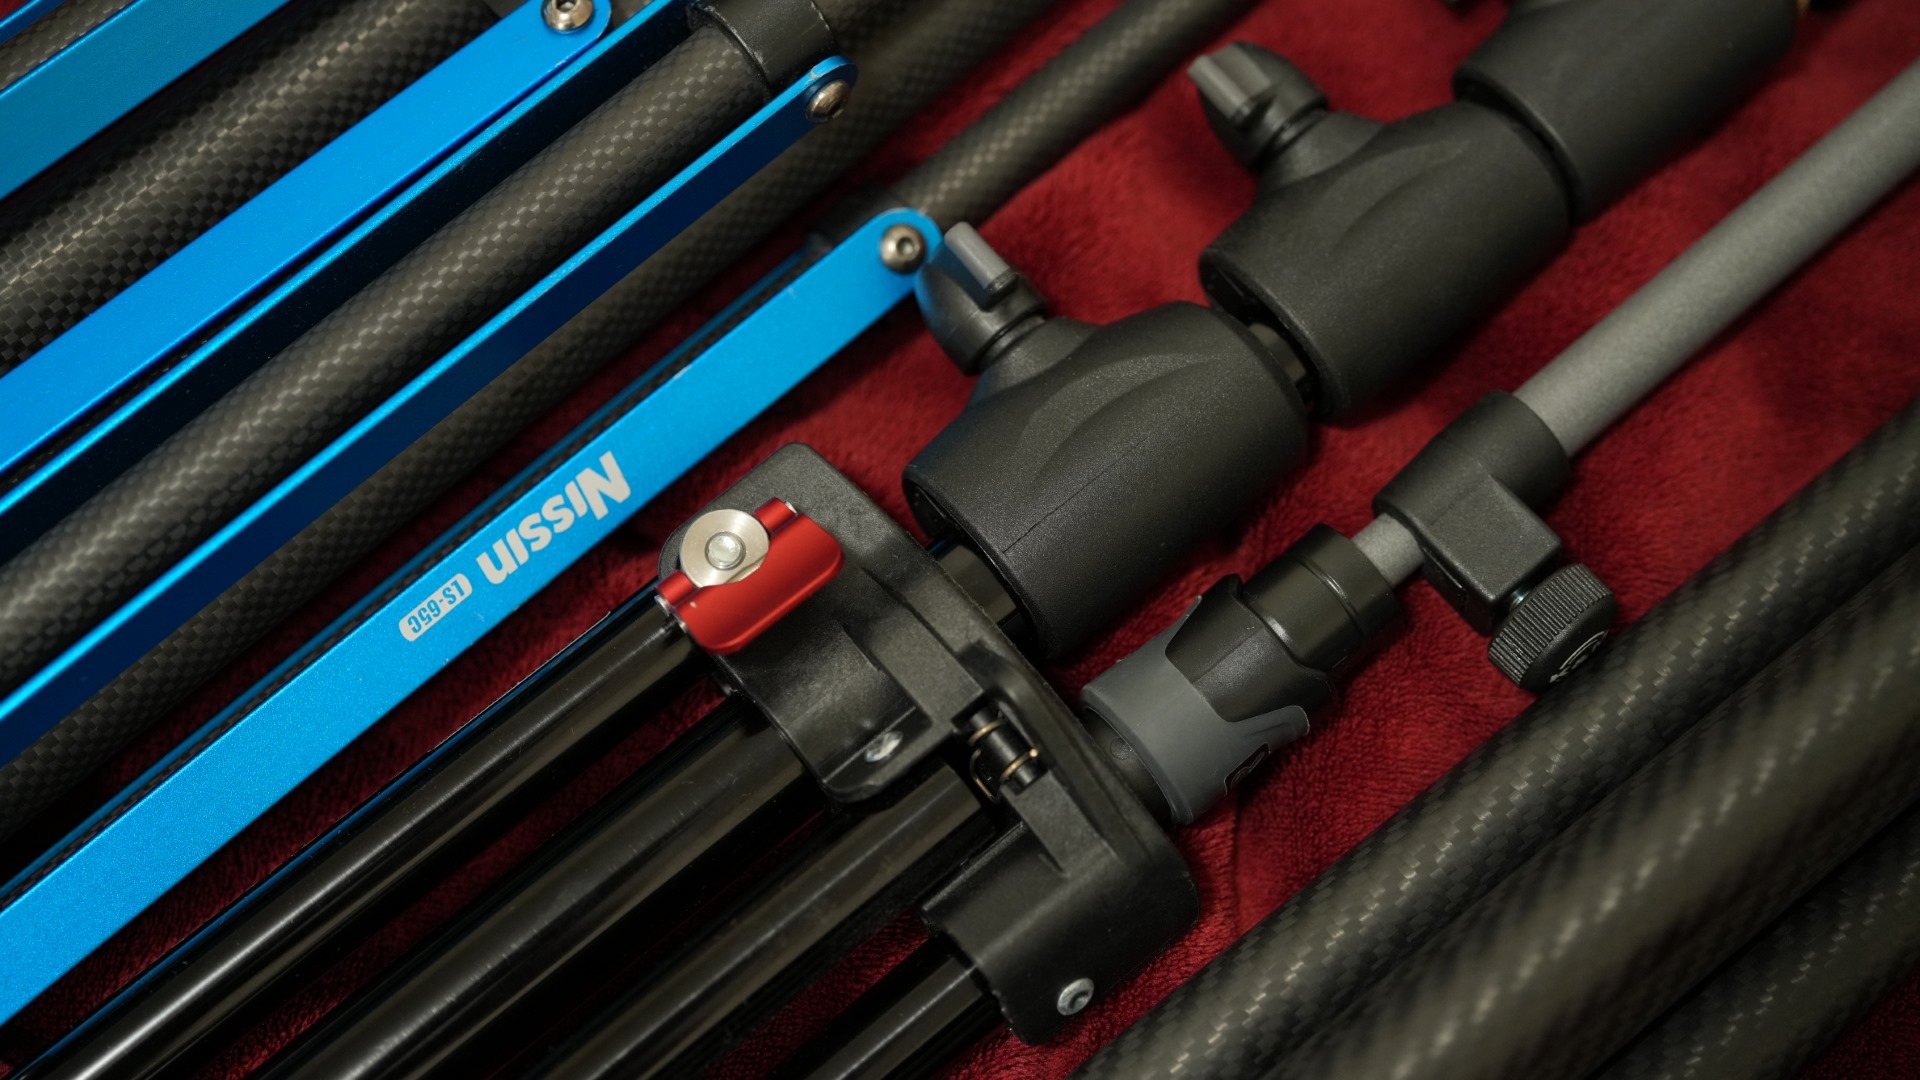
Stands
In just about any studio in the world, you’ll find heavy-duty steel stands by companies such as K&M, Latch Lake, Triad Orbit, Gator, and On-Stage. Weighing in around 5-10 lbs each, these stands are well suited to protect heavy expensive tube mics from meeting an untimely demise on a thinly-rugged floor.
However, for recording on the go, these stands have a few issues: (1) they’re incredibly heavy, (2) they are vastly overkill for holding some lightweight modern condenser mics, and (3) they’re not really all that fast to set up.
In my opinion, the best stands for sampling are aluminum and carbon fiber lighting stands. The Manfrotto Alu Mini is one of the best values in this regard, stacking easily 4 to 5 to a bag, reaching a respectable 7′ of height, and having an air mechanism which slowly drops the mic, protecting it from a sudden drop. You can easily add a K&M boom arm to the end for extra reach or tilt and turn these into incredibly light, powerful stands.
The much larger Alu Master is useful, but gets pretty heavy and 12′ isn’t that often necessary in sampling.
For carbon fiber, my current go-to is the Nissin LS-65C, which is extraordinarily lightweight and quite tall (only really suited for a single SDC on top). For heavier mics, the Sirui DK28 is great (with air damper mechanism too!).
The one downside to lighting stands is that they all have so-called “spigot” connectors with either 3/8″ or, worse, sometimes even 1/4″ threads on top, compared to most American mic clips which have 5/8″ threaded connectors.
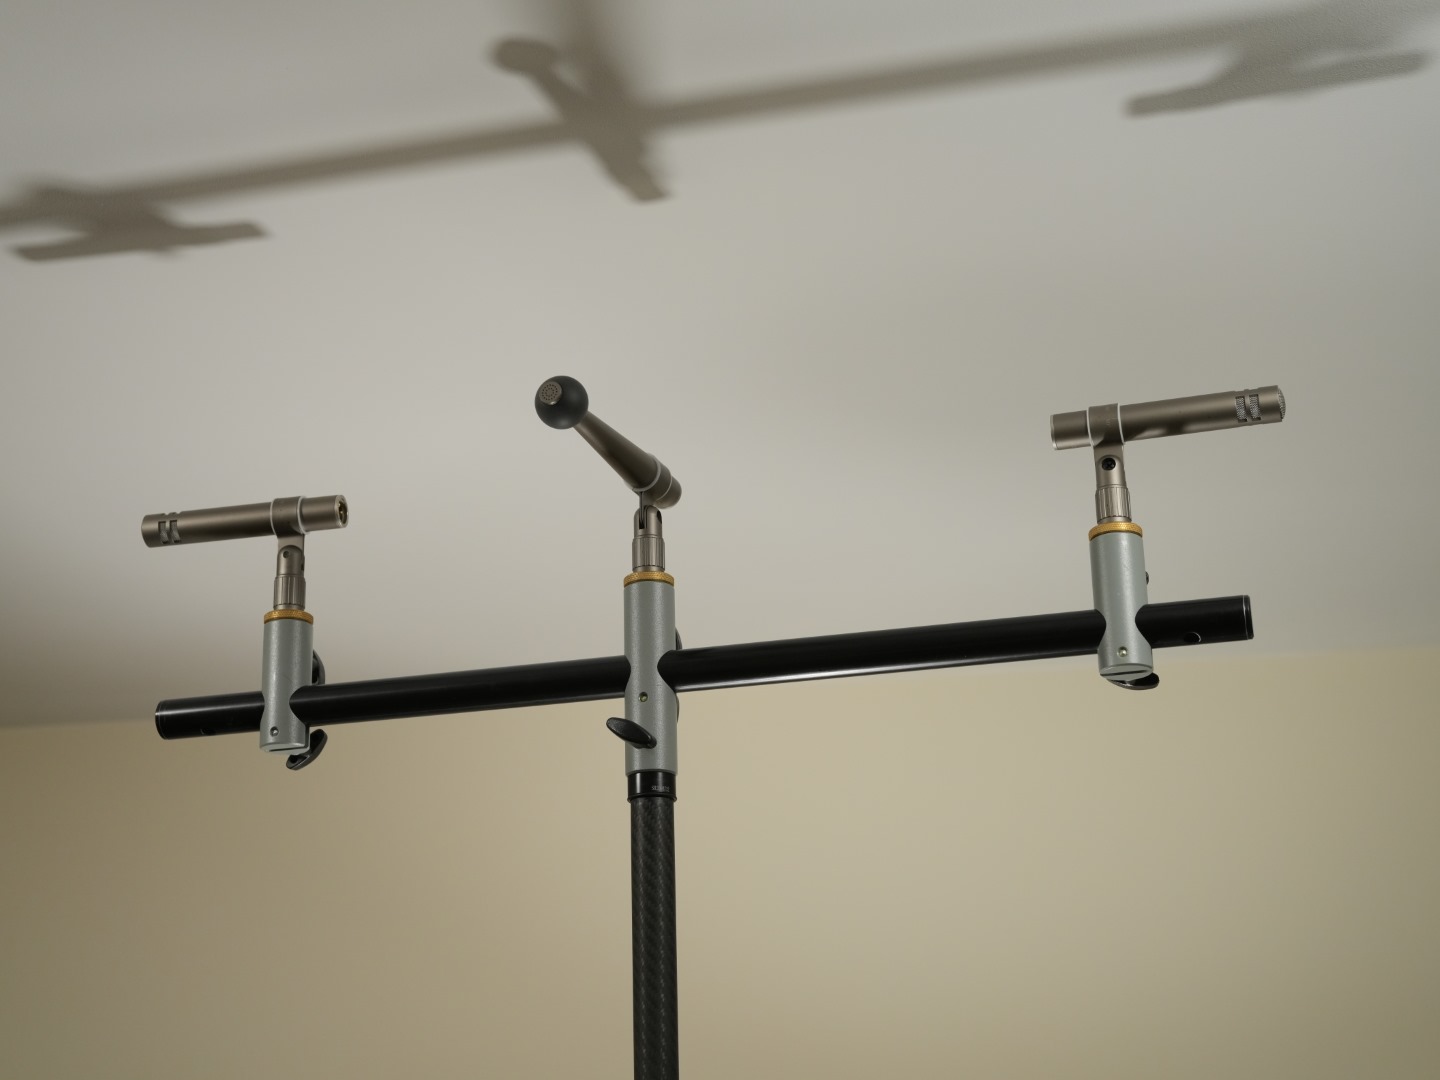
Stereo Bars and Clips
Stereo bars are an excellent addition because one stereo bar can hold 2 or even 4 mics. K&M make a wonderful small bar, model 23550. You should keep 2-3 of these kicking around. If you need a larger stereo bar, in particular one which is compatible with light stands with spigots, Manfrotto’s 154 triple mic holder can facilitate recording patterns as wide as 66 cm, plenty wide for anything short of decca trees. Beyond that, things get very expensive very fast.
For mic clips, I prefer Rycote, in particular models INV-7, INV-6, and INV-HG mkIII (the latter for particularly heavy mics). Shure A53M and A55M are also quite effective. Generally though, you can often just use whatever the manufacturer provides unless you notice a lot of structure-borne noise on tapping the stand.
The annoying mess of threads is something to keep a careful eye on. You should generally try to standardize around 5/8″ threads or 3/8″ threads. For example, I work almost exclusively with 3/8″ threads, using Rycote mic clips (3/8″), European K&M boom arms imported from Thomann (3/8″), and lighting stands (3/8″). These threads are faster to screw in and most of the lightweight gear on the market is 3/8″ anyway.
Quick Releases
Completely avoiding spending time screwing and unscrewing your mic clips from mic stands can shave minutes off your setup and breakdown time. However, simply leaving the clips on can result in damage or make the stands difficult to effectively pack and transport. Using quick release mechanisms can be an effective way to avoid this.
My favorite quick releases are the Rycote and Triad Orbit types. The Rycote are considerably lighter and smaller, but the Triad Orbits are much more popular and better priced. Both are very well made and will save a lot of time.
Avoid very cheap quick releases or those of other brands, they are not reliable, some are not even safe to use.
Note that the Manfrotto 154 mic holder’s spigot attachments act as quick releases of their own.
Recording Software
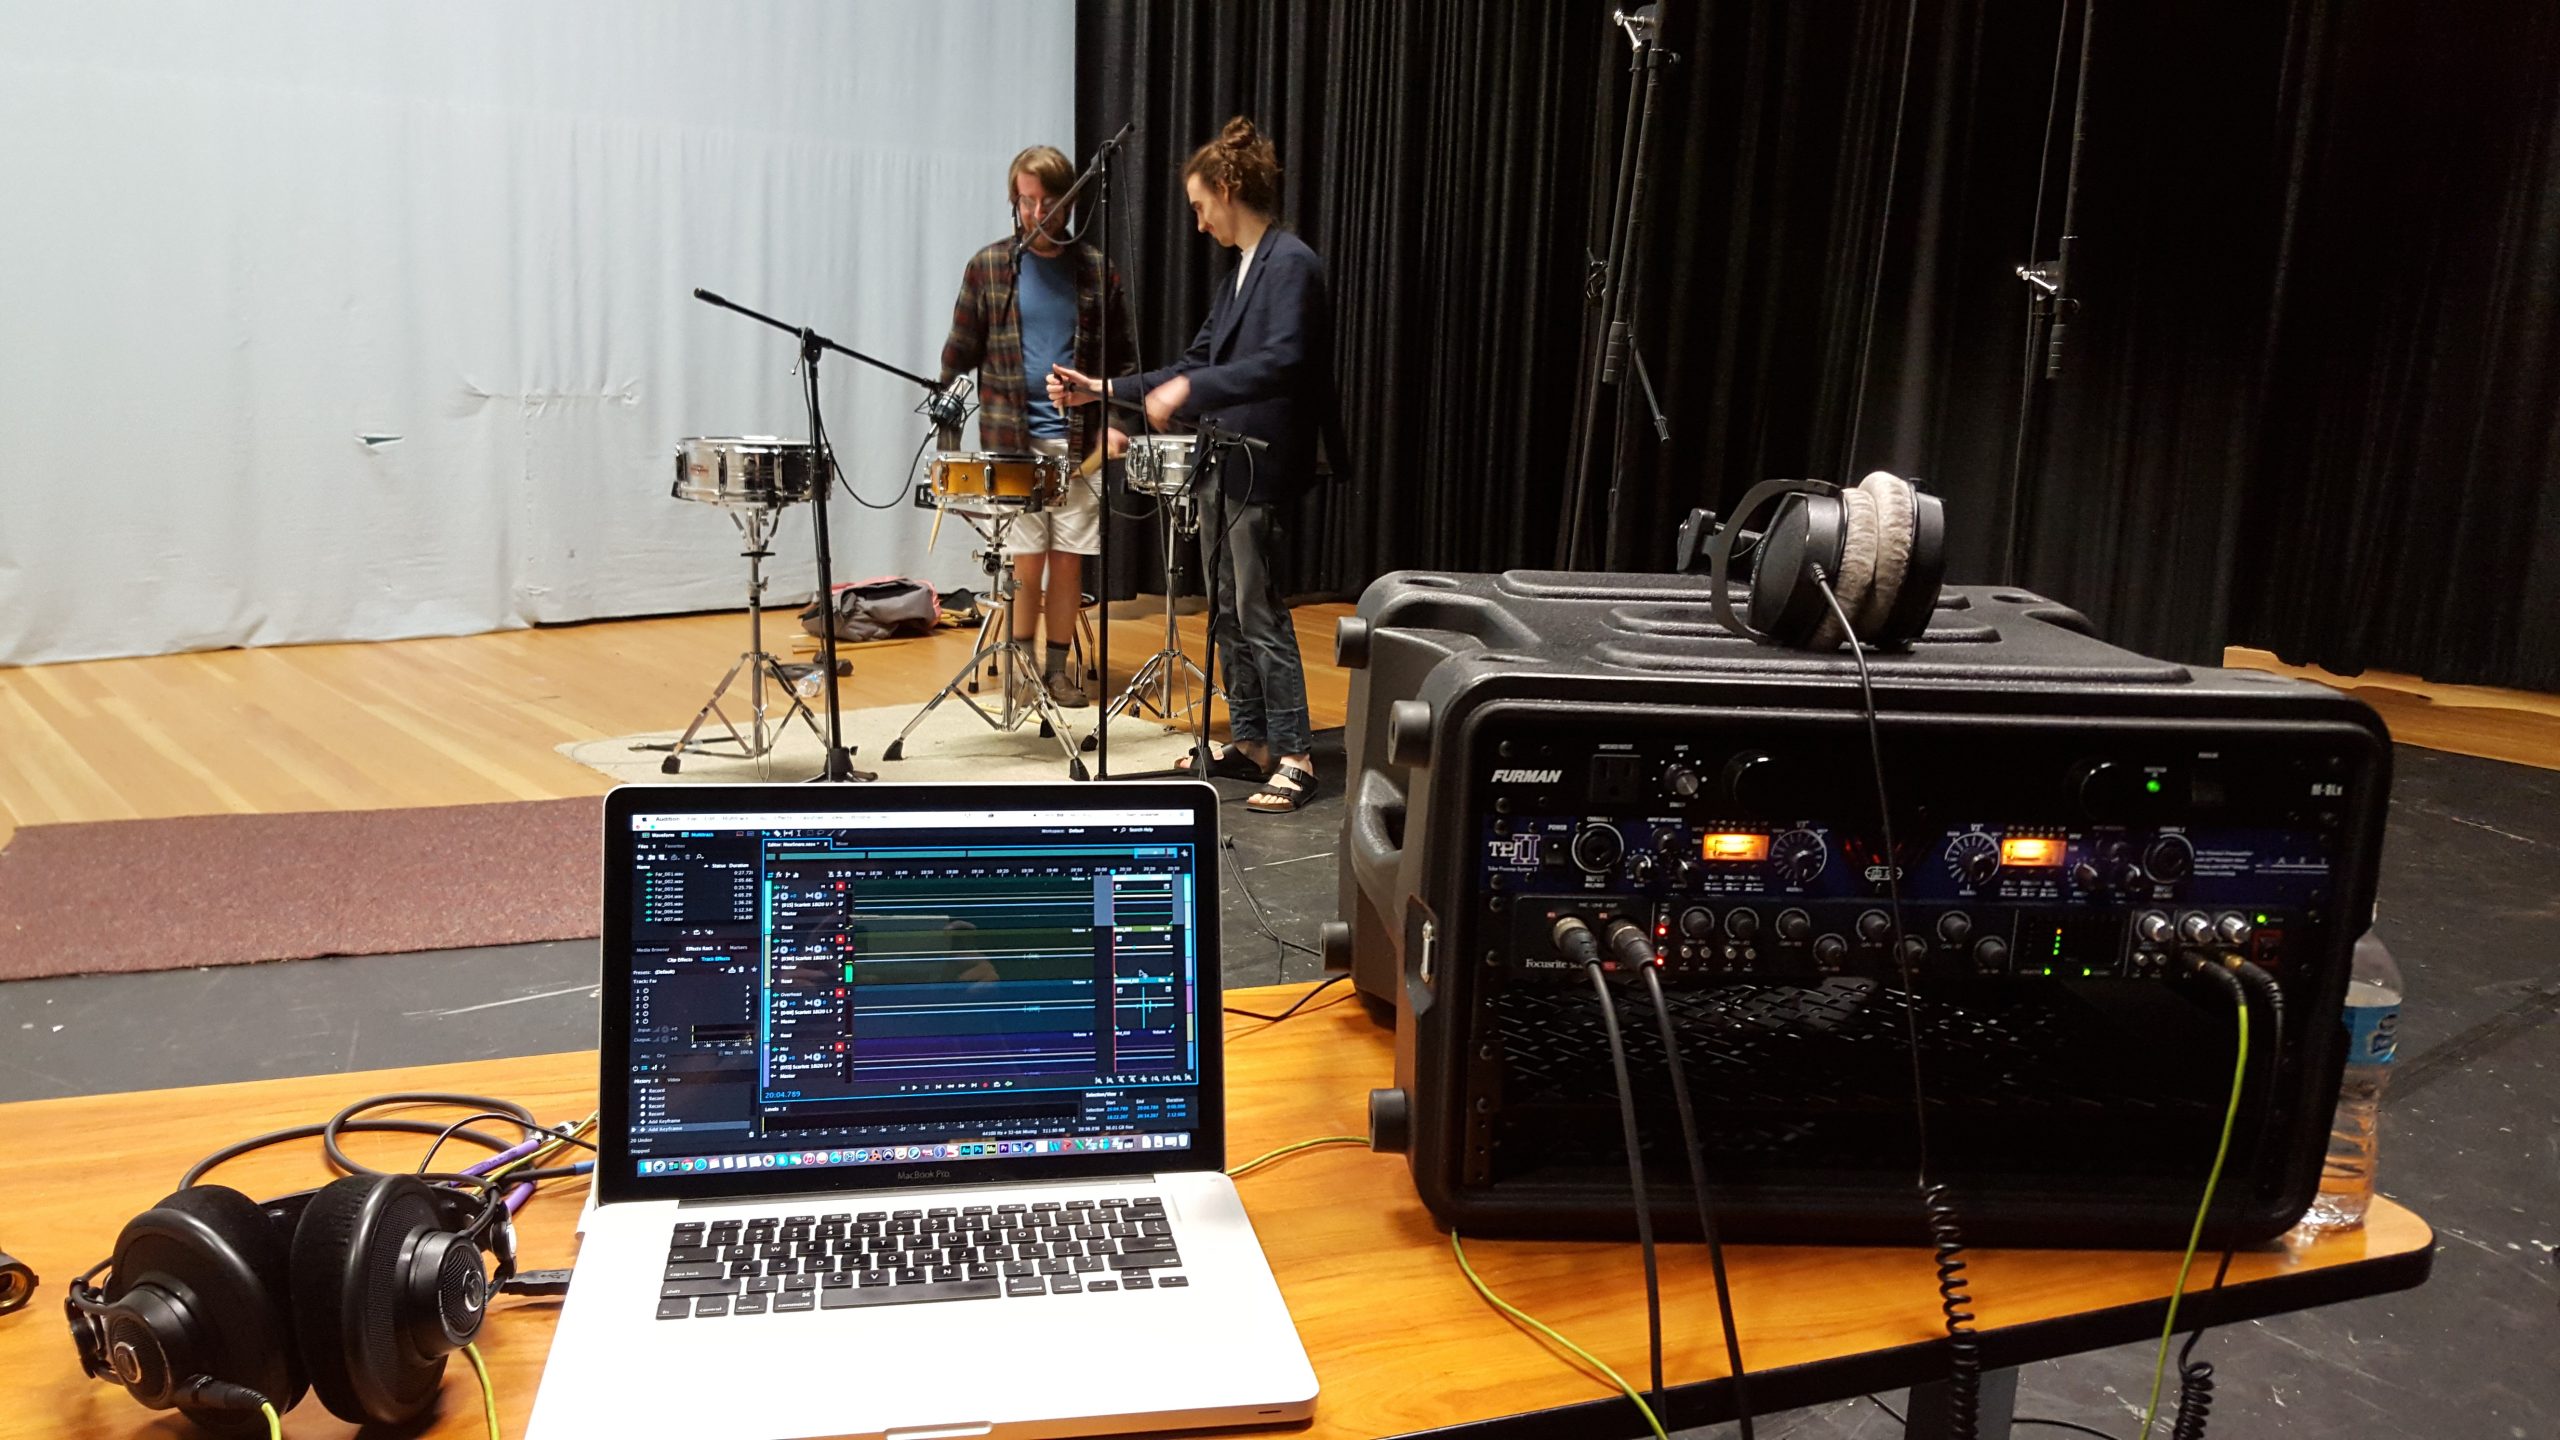
You should find a piece of software that you are comfortable using that allows you to record multi-track audio. Audacity is the most simple tool that can do this, but instead I would recommend Reaper. Most DAW’s will work fine, but they all have quite a bit more overhead and excess than Reaper, which is pretty minimal on open.
Reaper is also by far the most efficient tool for cutting samples thanks to its unique advanced keybind options and custom macro-esque keybind functions. There are some excellent videos by Simon Dalzell of Ivy Audio on how you can efficiently process and cut samples using Reaper. Some folks have started using Ardour, an open source DAW, for similar reasons.
Set up a multi-track session. Create an audio track for each microphone or microphone stereo pair (remember if you have a three-mic array such as a Decca Tree, it should be recorded as a stereo pair and a single mono mic, but the two can be merged and mixed down later on). Your objective is to get as raw and unaltered of a recording as possible- take care to not use any preamp effects or mixdown several positions to one instead of recording them separately. The more flexibility and detail you incorporate in your original recording, the more options you will have later.
Session parameters should be 48 kHz @ 24-bit. You won’t use all of the 24 bits per sample due to the limits of modern ADC’s, but it is important to avoid adding quantization error in fade-outs on samples, especially if you don’t normalize them.
You likely don’t need to record at a higher samplerate unless you are planning to massively repitch the sounds, such as for an effects library. The sample rate needs to only be double the maximum frequency we need it to represent, in this case 20 kHz, the maximum range of human hearing (if you’re 4 years old), plus a 4 kHz buffer to improve processing. Chances are, even if you are using high-end mics, they can’t pick up frequencies above 20 kHz accurately anyway! So, there’s virtually no point to oversampling except to waste hard-drive space.
Headphones & Monitoring
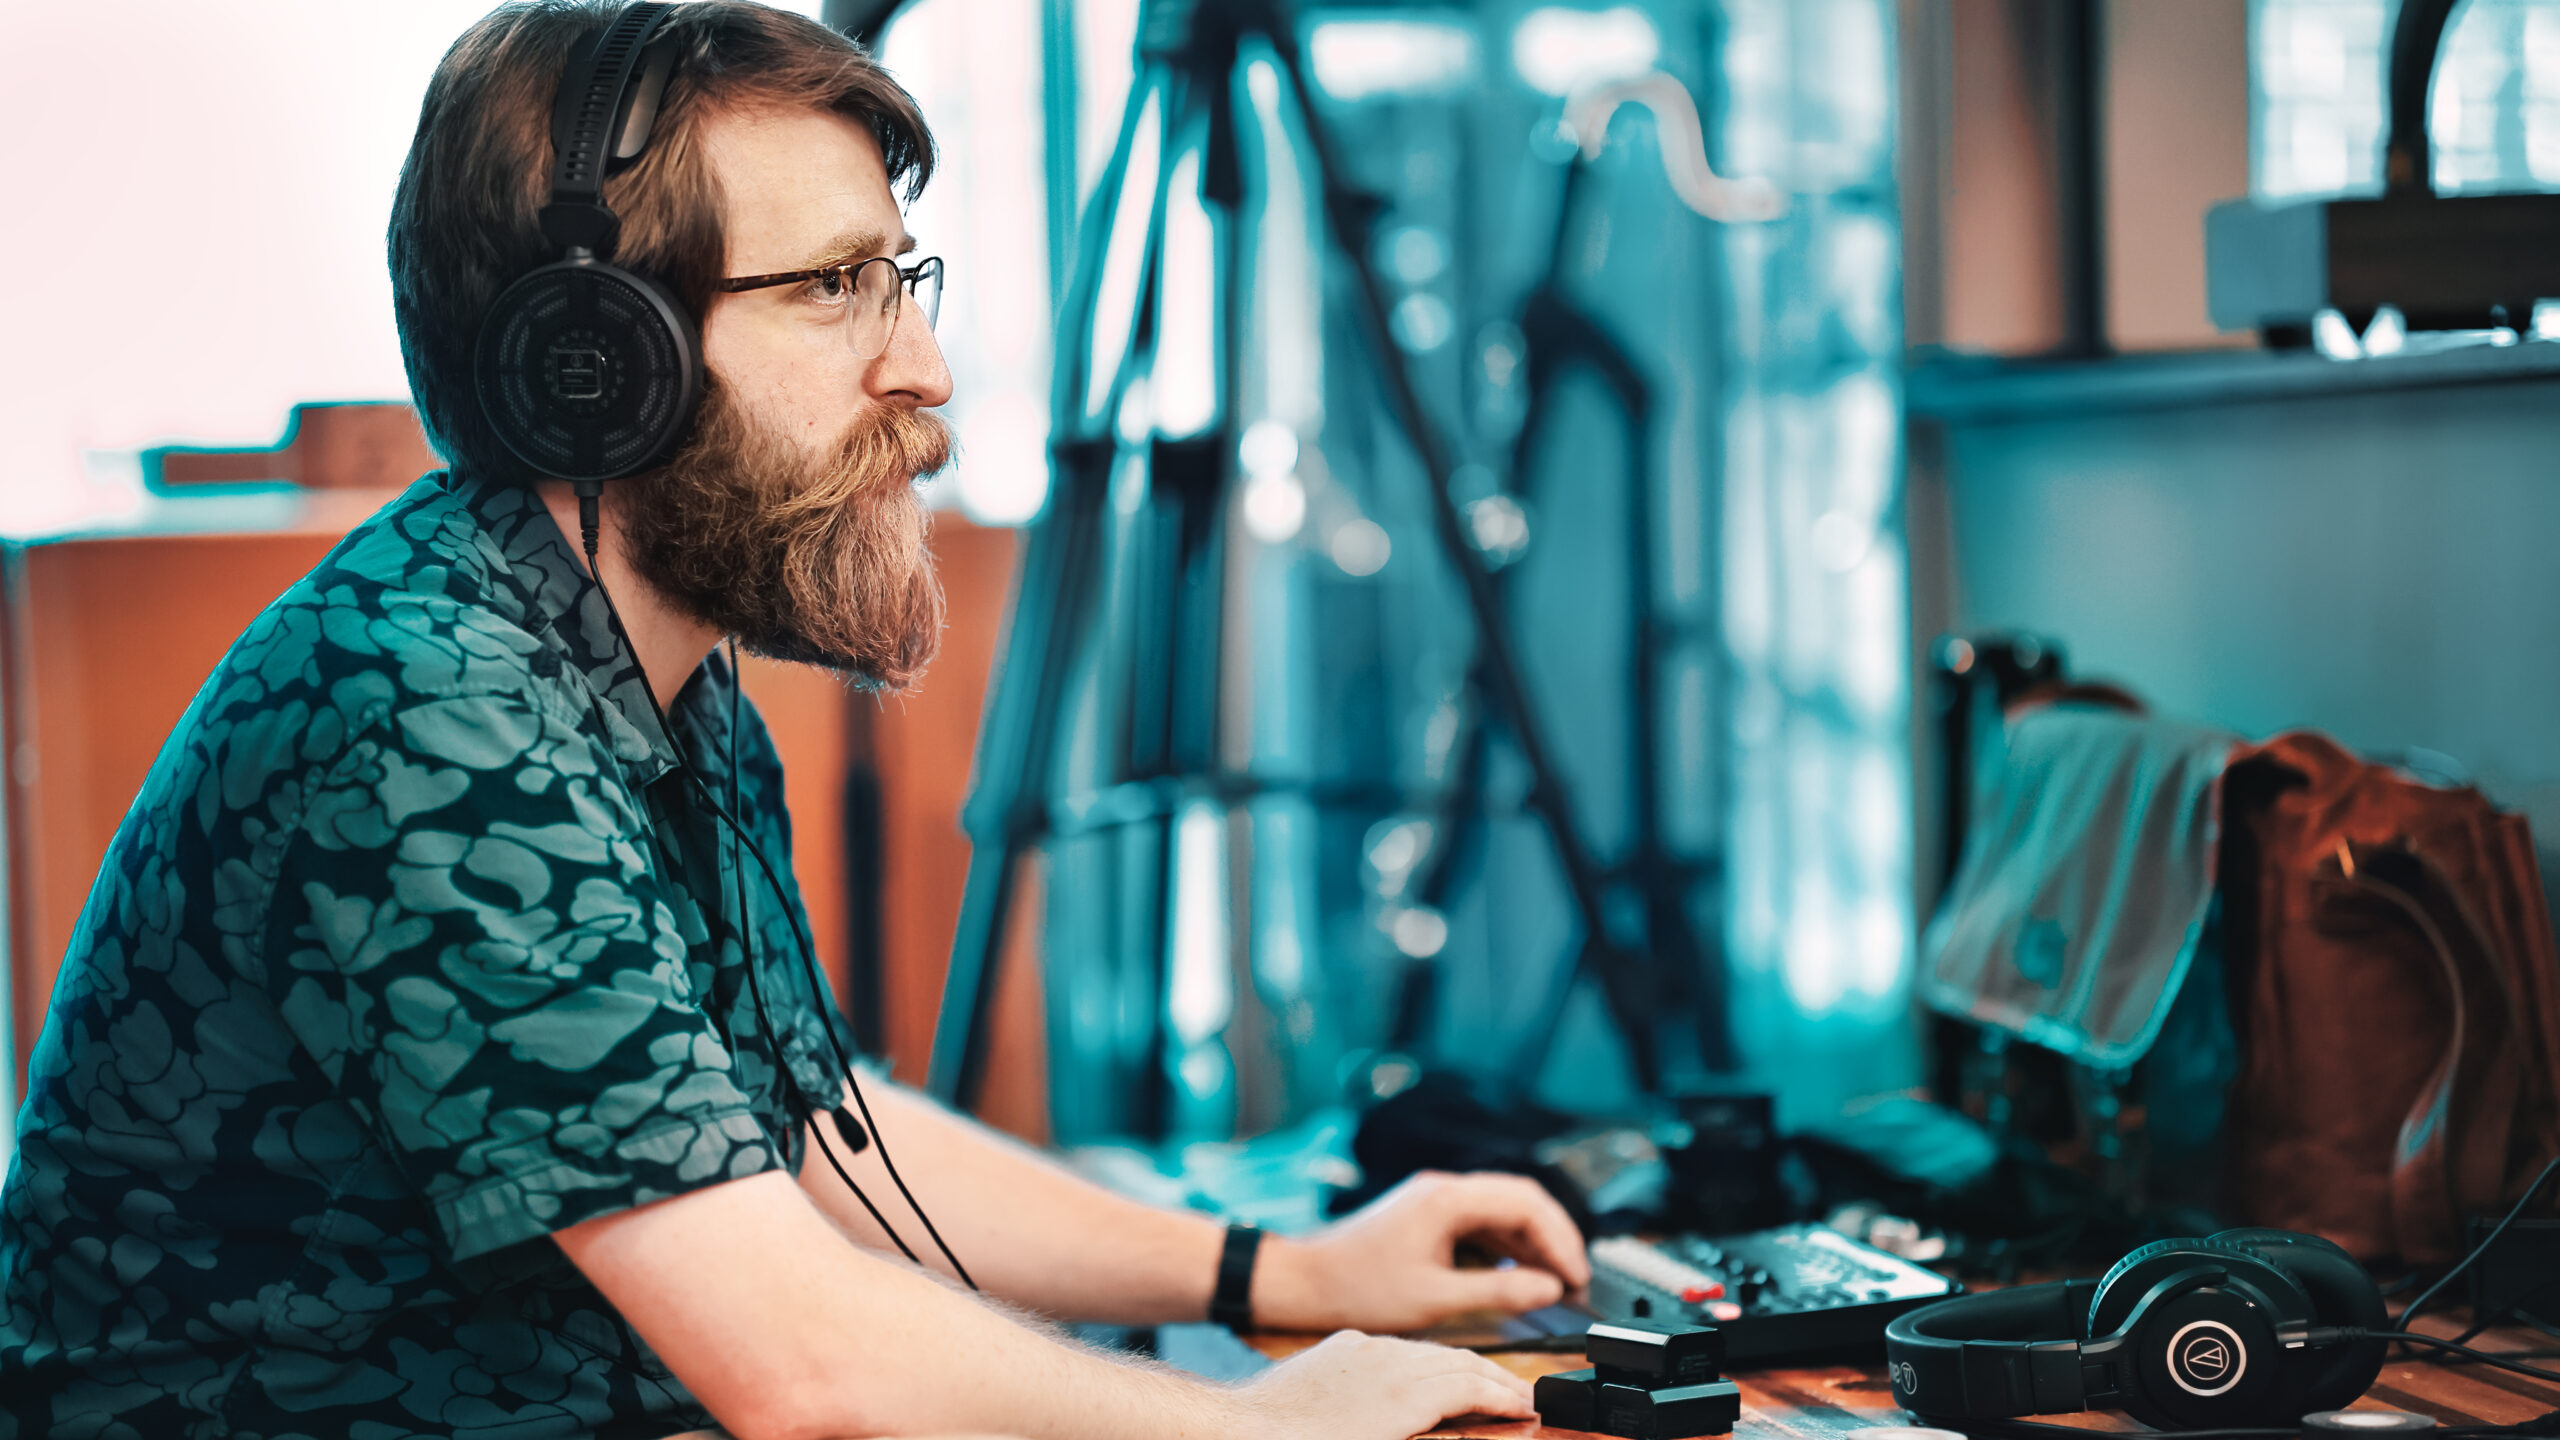
In a studio environment, if you are using a control room, you’ll be able to use monitors, but even this can be misleading if you are not familiar with the room and the monitors, or if there are other signal flow issues (e.g. most active monitors have some degree of standby noise which may mask noise problems only headphones can reveal). Plus, given “Guerilla Sampling” can happen literally anywhere, headphones are more or less a must.
There is a massive amount of information and misinformation regarding headphones and monitoring in general online. The fundamental basics boil down to three questions:
- Is it comfortable?
- Is it accurate?
- Is it reliable?
In sampling, you’ll have to wear your headphones for hours at a time. Not only do you have to worry about ear fatigue, you also have to worry about the physical pressure and weight on your head and neck. For this reason, lightweight, over-ear (not on-ear) headphones are generally ideal.
Accuracy and reliability are important as well. Consumer headphones often distort the frequency response wildly to obtain “SUPER MEGA BASS”, and cheaper headphones, especially closed-backs, struggle with dynamics and staging. This can easily give a false sense of mics being too wide, too narrow, too close, or too far, which is obviously very bad. The last thing you want is to get back home only to realize all your mic choices you just spent dozens of hours using sucked.
The only issue here is that every single person has not just slightly but significantly different hearing (deviations of 6 dB or more!). As a result, headphones that sound amazing to one person can sound dull or brash to others.
Worse still, even headphones designed for “professional” use can have wildly varying frequency responses and properties. The ONLY real solution is to physically go to a store with a ton of headphones and try them all.
Cheap headphones also tend to have poor reliability, lasting only a few years before they start cracking and falling apart. Also many very cheap headphones have problems with noise from brushing the cable being audible in the earcups, not to mention problems with breathability/headphones becoming very sweaty/uncomfortable.
I will at least share a few starting point observations/recommendations:
My favorite headphones for mixing are ATH-R70xa’s. These are ~200g over-ear open-back headphones which are sublimely lightweight and generally comfortable in particular on wide or tall heads with little tension/force. I find their frequency response to be ideal for my specific hearing and the needs of mixing classical & jazz recordings outside of a studio environment. However, they have little to no attenuation of outside sounds and bleed sounds significantly to the sides (not as bad to the front though). For this reason they aren’t quite ideal for sampling, but can be a great reference for listening back between takes when monitors are not available.
Of similar price and quality are the Neumann headphone models, which include both a closed back and open back, though they are much heavier/bulkier.
At the low end for closed-backs, the perennial favorite has for decades been Sony MDR-7506 or ATH-M50’s. Neither is terribly accurate or high quality, but both are reasonably affordable and approachable with different people preferring one over the other.
AKG makes the decent K371, which is at least vaguely in line with the Harmon “ideal” frequency response curve (which AKG-Harmon designed based on user input). I find for me personally, they fit and sound way better than ATH-M50’s and the bluetooth version is great for everyday use and travel on the side. The response is okay for monitoring, but I wouldn’t mix on them (or any closed backs really). I found upgrading the earpads (Dekoni elite sheepskin), though a bit tricky, did improve the imaging and comfort significantly.
With closed backs there sort of is no “magic bullet”. They all vaguely suck at imaging and transparency compared to open backs, even all the way up to crazy high-end audiophile models like Focal Stellias. However, they are a necessary thing for sampling if using a reference drone or click as the last thing you want is bleed cleanup work.
The only thing I would avoid with headphones is stuff like planar magnetics. They are just too heavy for long days, even pro audio designs like Audeze MM-100’s (475g vs. ATH-R70xa’s ~200g), no matter how great they sound.
Headphone Impedance
Headphone impedance is likely something you will run into if you are running long cables or splitting headphones passively.
-
- Low impedance headphones are easier to drive, but distort faster at high levels or with longer cable runs.
- High impedance headphones are harder to drive, but offer better dynamic performance, especially over long cable runs.
This is the exact same as microphone output impedance & preamp input impedance. In microphone – preamp connections, we know that we want impedance bridging, i.e. a 1:10 or greater ratio between the two. If the mic is 100 ohms, we want a preamp with at least 1000 ohms receiving its signal.
In the same vein, headphone preamps found in some, usually less expensive interfaces may be higher impedance than desired, for example the Zoom F8n Pro has an output impedance of <18 ohms, which is quite high. Using 32 ohm headphones with the F8n Pro can result in distortion at high levels, especially if over a long headphone extension. Here you should either use an external headphone preamplifier or keep to short runs OR high-impedance headphones (>200 ohms) for best results.
Sheet Music, Plans, and Aids
You will want to have prepared a method for proceeding through your objectives, as well as a plan for the recording setup.
For example, you can work through velocity layers- e.g. recording the entire piano on one velocity layer through all round robins, then proceeding on the next velocity layer. This is better for soloists and instruments with fixed pitch, and ensures your velocity layers remain even.
Alternatively, you can work through each note, proceeding through all velocity layers on a single note before proceeding to the next. This is better for ensembles of instruments with mobile pitch, such as wind and bowed instruments, so the players can really get the note in tune and with good tone (although fatigue may be an issue).
An extreme version of the per-note approach exists where you work through all the articulations on each note before continuing. This is extremely useful for ensembles of less skilled musicians, where it could take up to 30 seconds to get a single note in tune. You can literally save hours of tuning by getting the note tuned up, then doing all the articulations on that one note, then proceeding to the next.
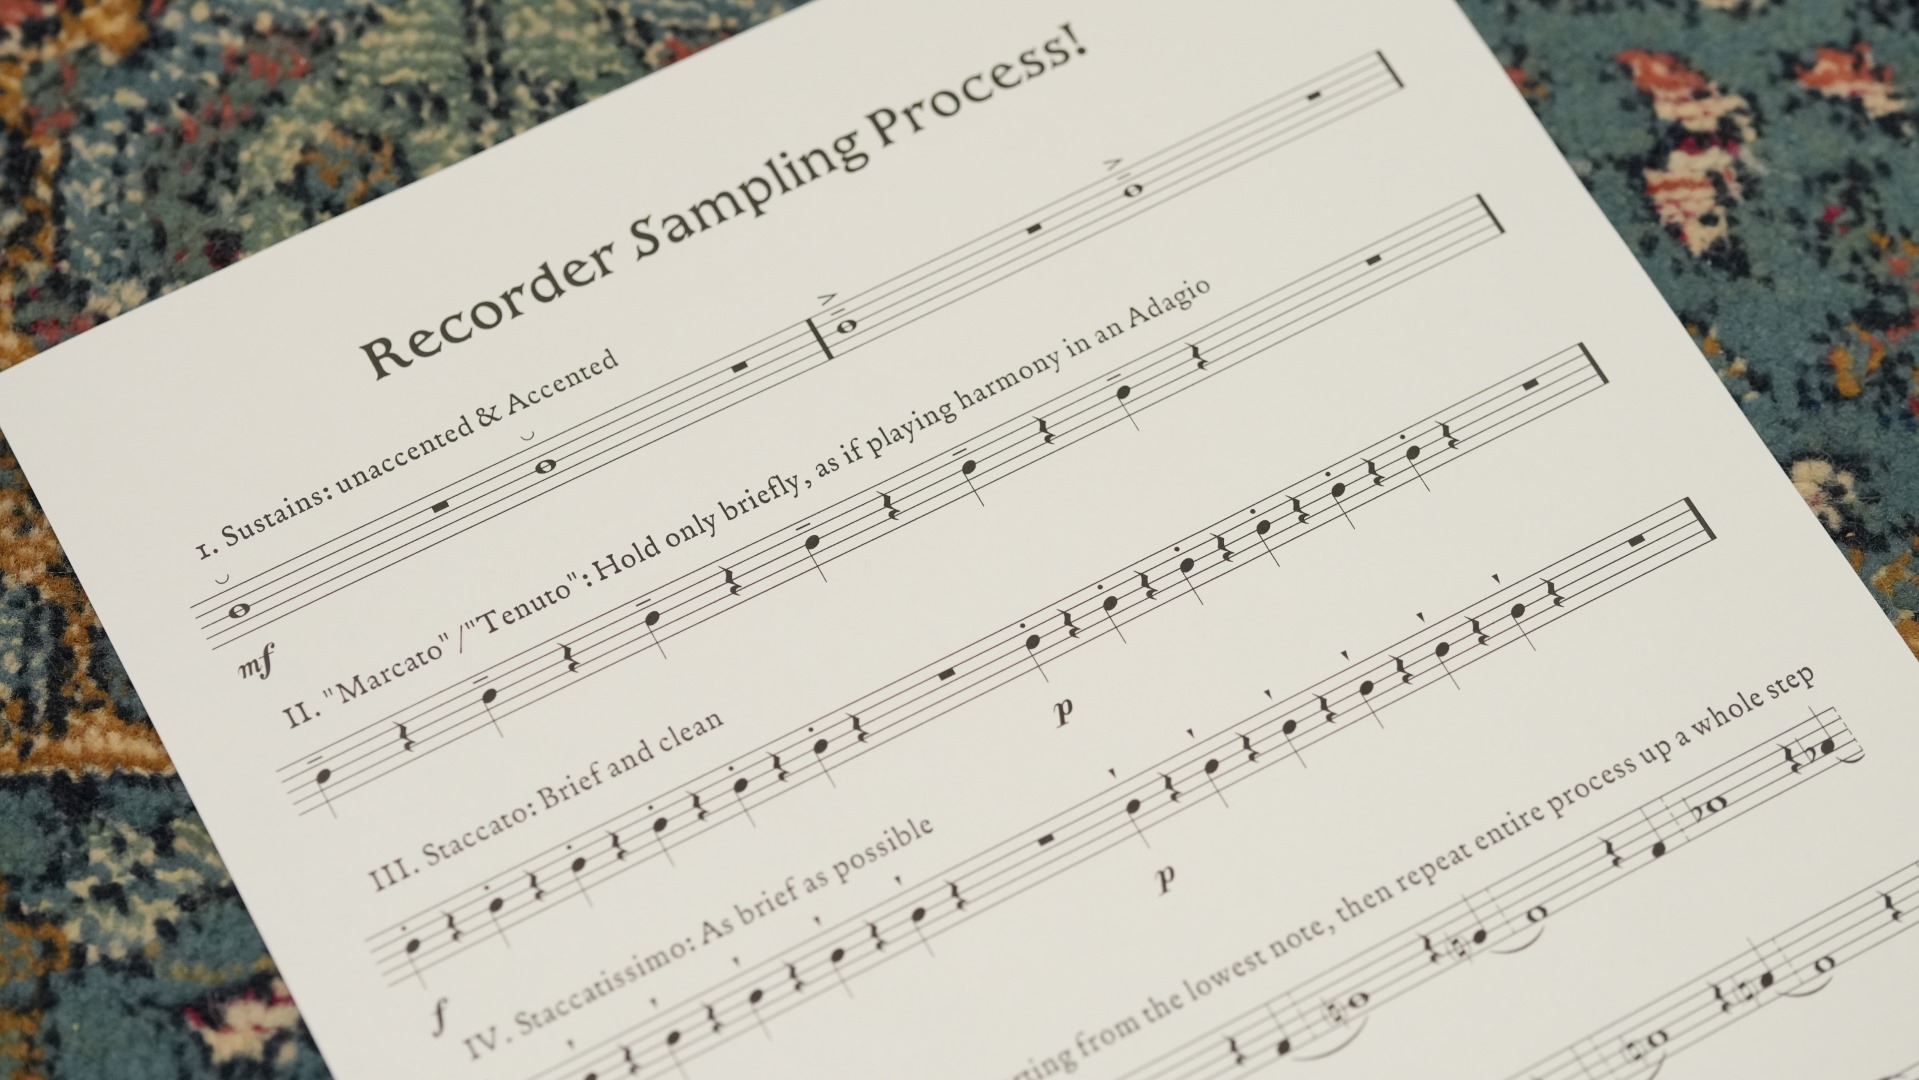
When using this approach, it is important to make sure everyone remembers where they are in the session- which note, which articulation within that, which VL within that, and which RR within that. It can obviously get quite confusing! Therefore, in some cases, it may be handy to prepare some sheet music that notates each articulation in an orderly fashion with a notation of how many repeats and dynamics is needed.
Some developers may use click tracks while recording. I personally find these distracting not to mention have some concerns about bleed, but for a large ensemble in a well-equipped studio with lots of headphones available, this may be helpful.
Conduction however is useful specifically for ensembles/sections. It is not necessary with soloists (and can be a bit demeaning or, at the very least, distracting).
To avoid pitch issues, you should either have the player perform with a tuner on a stand, or, even better, perform along with a drone or reference pitch. I did not use this for VSCO 2 and ran into all sorts of problems having to tune and pitch correct samples. Don’t do that. Use a drone!
Working in a Studio Environment
While this text is more designed for individuals working under the radar, there are a number of cases and reasons in which you may be using facilities designed specifically for the recording of audio, the recording studio.
Studios come in all shapes and sizes (literally), but for budget sampling it’s most likely you’ll be recording in a repurposed living space that used to be, or still is, part of someone’s house. As such, the first concern is noise.
By default, most studios are selected because they are much quieter and more suitable acoustically for audio recording than other portions of the house or building in which they are located. Custom studios with designer live rooms are specially designed to not only sound great but reduce exterior noise to near silence when closed off- as such, these nicer studios are definitely a great place to record.
The problem? If you’re not buddies with the owner, it may cost you an arm and a leg to sample there.
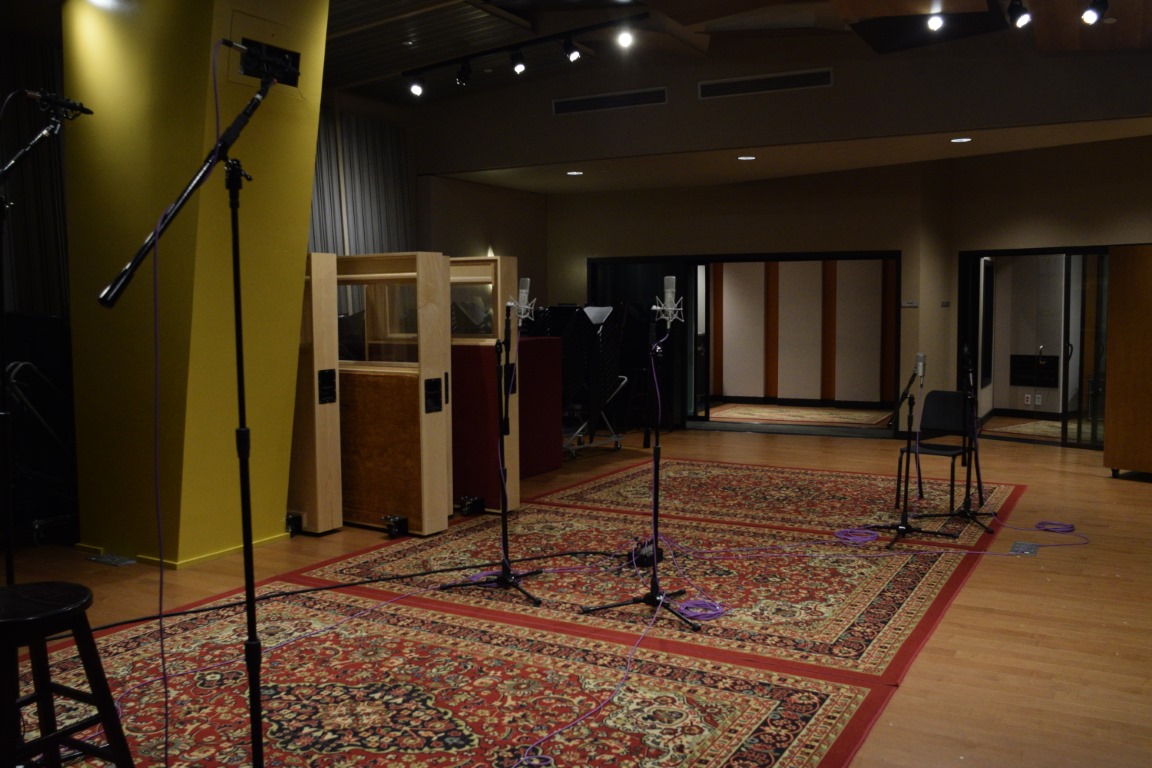
The first thing you should do if you want to record in a studio is to figure out where the local studios are. If they have websites, you should examine pictures of the locations. Look for live rooms (the rooms where recording happens) that are asymmetrical in shape, have high ceilings, a decently large size, and are at least slightly furnished. Even a rug and a bookshelf can make a major improvement in resolving undesired early reflections from the walls, which are the main cause of poor audio quality when recording in smaller spaces. Totally bare studio spaces are problematic for sampling because main and far mics will get a lot of early reflections which will cause a muddy sound.
Also examine pictures for cleanliness of the studios and general professionalism. You definitely don’t want to record for 6-8 hours in a room that reeks of beer and is covered in stains. If the studio appears very busy and can only accommodate short sessions, then it may not be the right studio for sampling, which requires consistent setups to be retained over several hours or even days undisturbed and without interruption when doing large projects.
Once you have narrowed the search down to 3-5 possibilities, reach out and explain your process and obtain a quote. If you can go by and visit each location, take the opportunity! A classic trick for examining the reverberation of a location is to snap your fingers or clap your hands in various locations throughout the room. What you typically want to avoid is something that sounds like a bunch of people clapping with you or like you’re in a bathroom. Instead, the sound should actually seem to almost disappear and be “sucked up” into the space, or have a smooth fade to silence afterwards. It doesn’t need to be completely dry, just dry enough to not have that ‘slap’ effect.
Studios are tricky to prep for because there are so many unknowns. Sometimes they are very well equipped and have so many mics and toys you won’t know what to do with yourself, others, it’s barebones with a few cheap mics. If you can get a glimpse at what their equipment looks like in advance, you can come up with a solution to adapt your procedures to fit their mic locker. For example, you can sub out a LDC you commonly use for another LDC with a similar response and pickup pattern, or bring your own. Don’t be afraid to incorporate the owner of the studio and the engineer in the decision making process. You’re the sample library developer with the end vision in mind, but these guys know this space and gear really well.
You should always try to prepare the engineer and/or owner for exactly what sampling entails. It’s long. It’s slow. It’s kinda boring to watch. They really should just go get a book or take a nap or something, honest. There will be like, two times, when they need to get up and press stop or record, that is, if you aren’t using your own setup and ignoring the control room.
If they are in the control room, the most complex thing the will be asked to do is glance at the volume bar and make sure we didn’t clip on a particularly loud take. Make sure they know you need individual stems of each array and ensure the sound quality is what you want- there is nothing worse than spending several hours sampling only to learn there was a miscommunication that results in a considerable loss of time and money.
This is generally why I recommend doing your recording on your own, because otherwise you will spend an enormous fortune hiring a recording engineer to use about 30% of their knowledge and 5% of their attention span for possibly dozens of hours of work… at the same hourly rate a normal project would expect 100% of both.
Working in a Diffuse Environment
Concert halls, churches and auditoriums rock. You always feel like you can’t play a wrong note in one, it all just resonates so beautifully. However, they are often a lot more noisy than you think.
Many concert halls have noisy air conditioning units designed for cooling rooms full of people, as well as fans to cool the lighting equipment and power supply. The best option is to use minimal lighting- don’t use spotlights, which often require the lighting power supply, and instead use worklights which run off the normal power grid. In addition, if possible, turn off the air conditioning and any other noise locations. However, sometimes you can’t turn these things off.
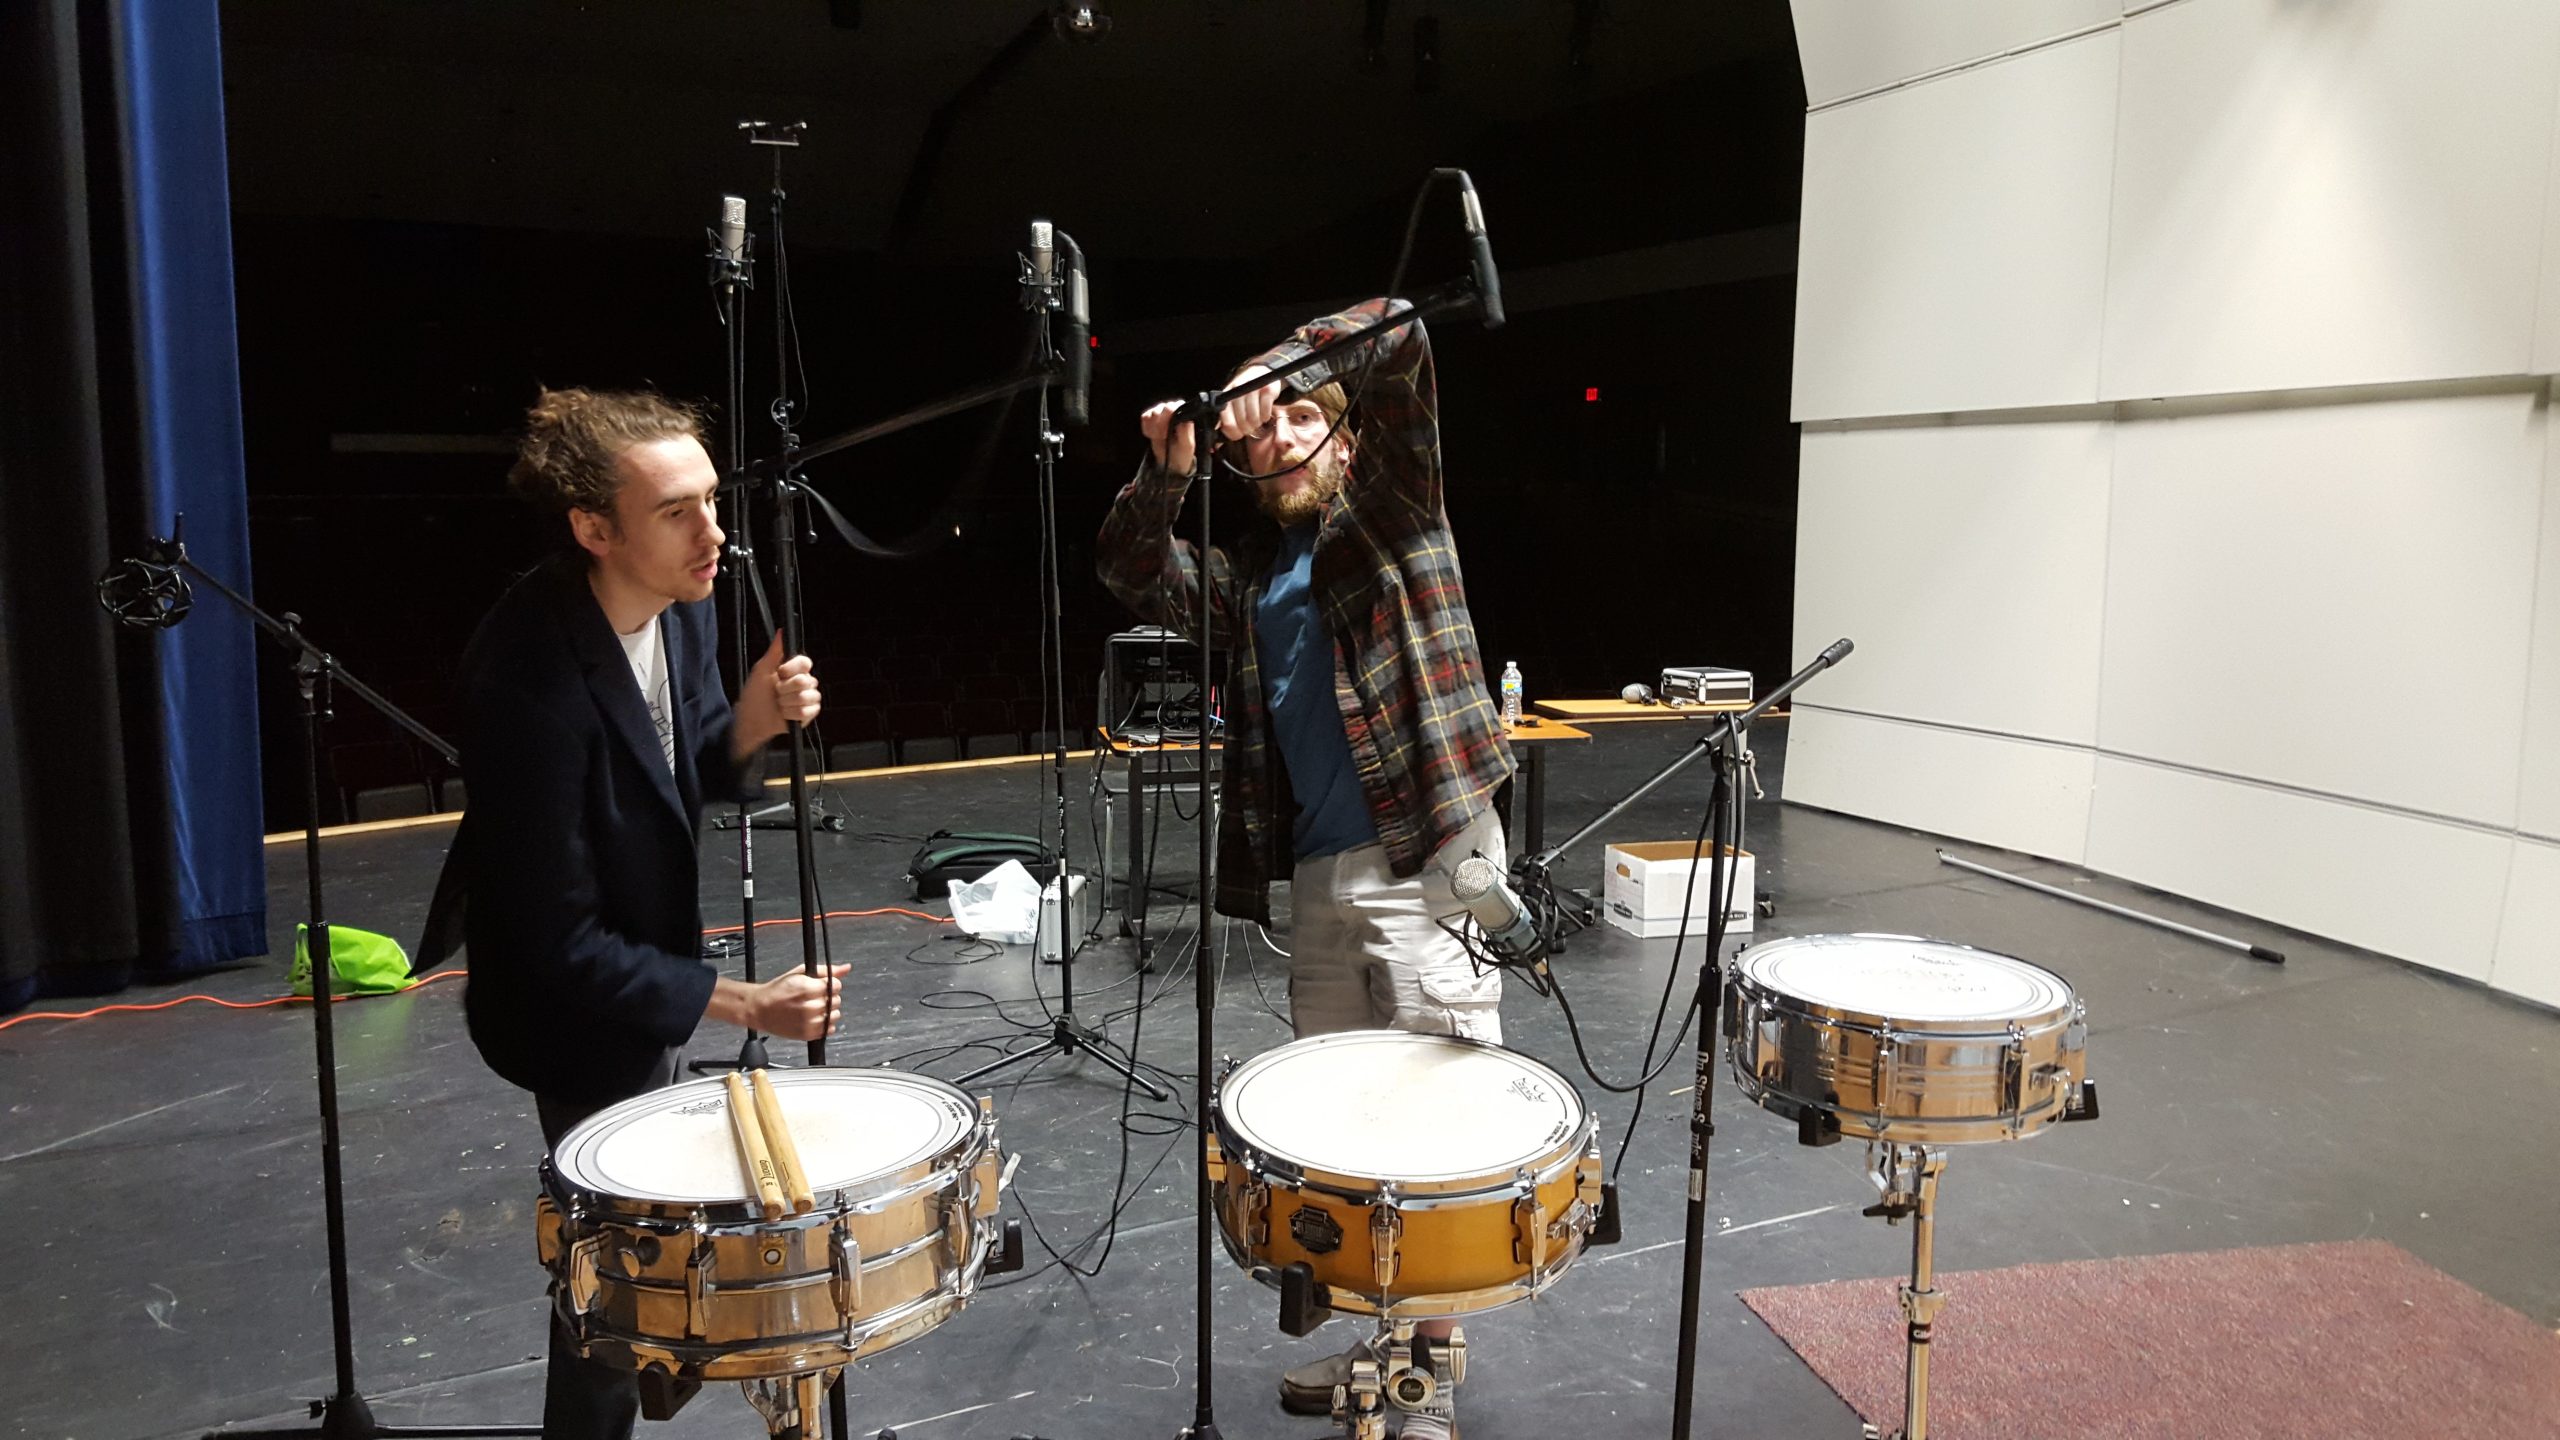
Often school auditoriums have large baffles designed to reflect sound from the back of the stage towards the audience. These can be moved and repurposed to block the sound from one portion of the space very effectively. Although this effectively reduces the size and modifies the nature of the space, it definitely helps. I once reduced noisy AC from one side of a stage that we couldn’t disable by about 30 dB just by using these large extendable baffles, allowing us to record quiet instruments safely, even using far mics. (see photo at top of this section!)
When recording percussion, it’s particularly important to police the reverberant nature of the hall for the best results. I always use a rug under the percussion so that close mics will produce a dry, clean sound. On a stage, most reflections comes from the ceiling and the floor and it won’t be very pretty compared to the rich reverb in the hall itself.
When running a far mic position, don’t worry about getting “balcony” seats or anything insane like that, just run an array from about 20-40 feet back into the space. Even a position right at the edge of the stage is typically enough for “far” mics! If you are planning on recording in an auditorium, it’s a good idea to buy a 40-50′ stereo snake (no, not the living kind) so that you have the option to record distant sources without the living hell that is hooking half a dozen 20′ XLR cables you managed to scavenge in the mic closet on location together only to find one of them doesn’t work (it’s just about on par with replacing broken christmas lights in a string that won’t light up).
Keep in mind that if you use cardioid main mics, they will reject a lot of the hall (which is often good unless you like your main mix to sound wet, although that is typically unadvisable). Omni pattern mics will pick up everything in all directions, so they are good for a larger main mic sound without needing as much distance. You can also use surround techniques, like pointing a pair of cardioids up or backwards from the source, or a Hamasaki Square, but these will only be pleasant in rich environments with very low noise. The “upwards ORTF” and Hamasaki Square are among the better techniques for doing ambient mics in a noisy environment as they will capture less noise than distant omnis or rear-facing mics.
One of the main concerns of sampling in a concert hall is the difference in absorption between a full hall and, what you will likely (hopefully) be sampling in, an empty hall. Some go so far as to bring in sacks with similar acoustic properties to the human body and setting up a full orchestral setup. This really isn’t necessary, but can be done as a product differentiation method if desired.
All Systems Go!
We’ve now completed all the steps necessary to begin sampling. We have our players, our rig, our plan, and our location!
In the next post, we’ll explore the actual process of the session itself!
